Friday, December 23, 2011

Morning, Tomato People!

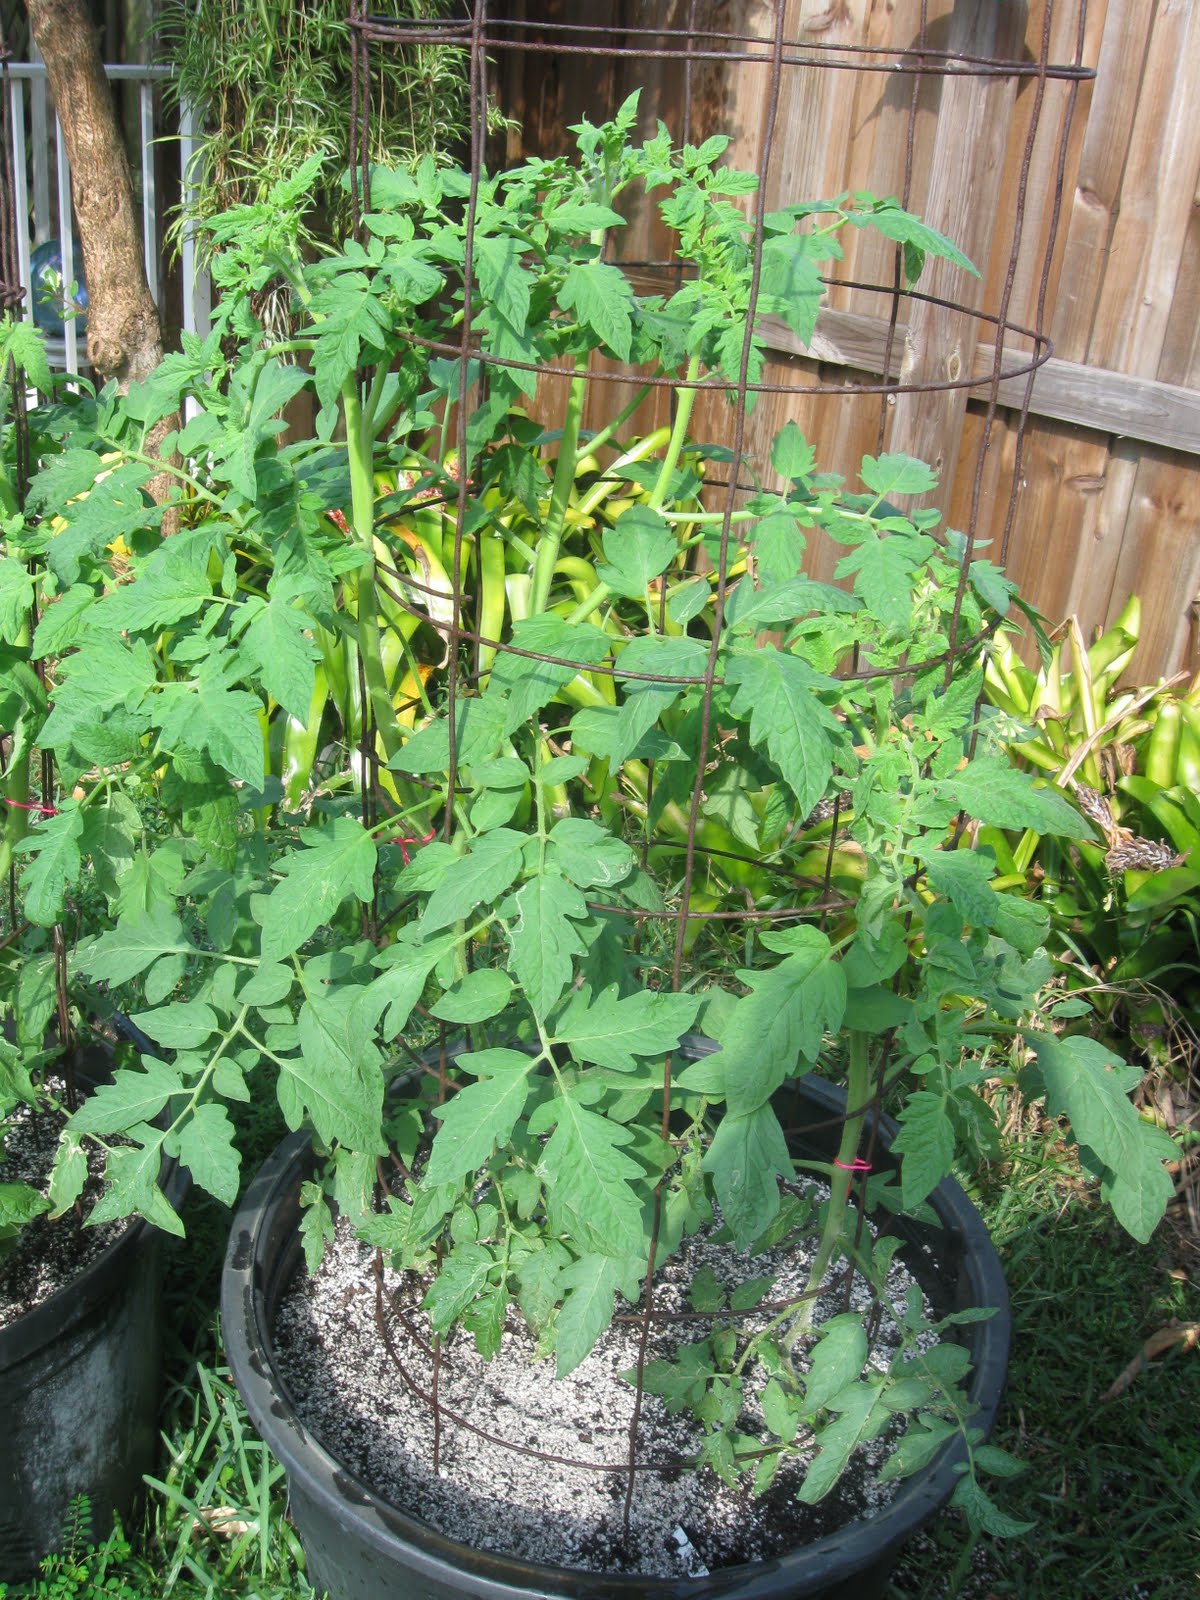
Good morning! I was watering this morning and took a few pictures so I could post. This season has continued its near-magical trajectory. I'm still feeding weekly with Tomato-tone organic fertilizer, but I've stopped spraying with the Key-Plex and copper fungicide. I've had to remove a few leaves with spots, but nothing I'm worried about. I also had a small problem with white flies over the last two weeks, but I treated with neem oil and they seem to be mostly in hand. There are still a few, but the population is much reduced. Other than that, I'm still watering every day and spending my mornings pinching off suckers and tying up plants. Last week, I had to extend my tomato cages to 8 feet because of overgrowth. I've topped all the plants at this point, but they're still trying to get up there, and since the sun is better up high, I want to let them get as tall as I can handle it to set more fruit up there.

So, to the pictures! At top left is my six-year-old son for a little perspective. The tomato he's reaching for is the Kellogg's breakfast, a giant orange heirloom that is growing like it's running from the law. Next to that are the BrandyBoys, still on the vine. These are Burpee's answer to the famous Brandywine heirloom. They are supposed to preserve the taste of the pink Brandywine, but bear much better on more vigorous plants. I haven't tasted them yet, but the vigor and yield is just as advertised: there must be 40 tomatoes on these two plants. Finally, the bottom pic is the green zebra. I can't wait for these little guys to come in. They look awesome. Of the heirlooms, the only one that isn't loaded with fruit is the black Paul Robeson. Sure, it has maybe a dozen tomatoes, but it's nowhere near the others.

Whenever I start to get cocky about my tomatoes, however, I need only look at the peppers to stay humble. I don't know what it is about me and peppers, but I must not have the touch for them. My plants look healthy, but they're dropping most of their blossoms and now the leaves on top are twisted and look unhealthy. Grrr.

Anyway, I hope everyone is having a good season and I'd love to see some harvest pictures when people start picking ...

Wednesday, November 23, 2011

On Magic Dust

First, my apologies for being a bad blogger. This past year, my regular work has kind of exploded, which is good if you're self-employed, but bad if you want to maintain a gardening blog. Today, however, is nice—I woke up, tended to the tomatoes and veggies, made a quiche, and now I'm sitting down to write my first blog entry in a month.

Also—and I keep waiting for the hammer to fall—I am having the easiest, most perfect veggie season I think I've ever had. It's just weird after last year's early season disaster, then the near collapse of the peppers and the ultimate collapse of the strawberries. Some years I feel like I'm fighting for every week, but not this year. This year, everything is growing like mad. No septoria to speak of. A few horn worms that I've been picking off as I see their droppings (because remember, bug poop = bugs, so look for them because they're there somewhere). No curly top virus. Just ... nothing wrong. Pinch me, right? The tomatoes are almost 4 feet tall already, and they've only been in the ground for about three weeks. They're loaded with blooms and the first fruit is setting already (I'm growing Brandyboy, green zebra [pictured], Kellogg's breakfast, and Paul Robeson). The peppers had a little white fly issue early on, but I've been treating with neem and it's well in hand. The mustard greens, herbs, broccoli, and other veggies are lustrous.

So what am I doing to have reaped this near-perfect season so far? Well, that's just the thing.

My big revelation has been preventive maintenance. I've been treating the tomatoes weekly with copper fungicide and KeyPlex since they were planted. I started treating long before any problem showed up. So I'm thinking I owe this season to preventive maintenance, because it's much easier to prevent a problem in the first place than fix a problem once it gets started. Other than that—and that's really all I'm doing different—I'm fertilizing every week with TomatoTone in very small quantities, watering every day, and that's it.

There's probably a lesson in here. I end up working on a lot of medical and nutrition books in my day job, and the same thing that works for plants works for people too. The disease you prevent is the disease you never get in the first place, and prevention is so much easier than treatment. Are my plants telling me to eat better, to drink more water, to get to the gym three times a week every week (not just some weeks), to take fish oil? I know this is nuts, but I kind of feel like they are.

Anyway, this has been my season so far. I'm really looking forward to harvesting later on. Unless tragedy strikes, I'm expecting a bounty crop of heirloom tomatoes and all manner of veg. And now, I'm off to start the holiday—we'll be brining our turkey this afternoon and starting to welcome guests as they show up. Have a good holiday everyone, and I hope your season has been sprinkled with the same magic dust mine has so far.

Monday, October 24, 2011

And They're Underway ...

How weird was last week, right? After three days of rainy, windy, overcast weather, I felt like I was back in Michigan where I'm from (and where the sun never shines in the winter). I'd wanted to get my tomatoes into their containers last week, but considering the weather, I just moved them under an overhang and waited.

And then this weekend! Wow. Talk about perfect fall weather. This is the kind of weather that reminds me why I live in Florida in the first place. So I spent a thoroughly pleasant Saturday buying my soil ingredients and getting things ready to transplant. Over the next few days, I'll transplant everything into their containers and expect to start harvesting in January. Once again, I'm doing tomatoes (25 gal. containers and 15 gal. containers), broccoli (Earthbox), several kinds of peppers (Earthboxes), strawberries (vertical towers), mustard greens (vertical towers), lettuce greens (vertical towers), and herbs (small containers).

A few early season developments ...

Believe it or not, the first bugs have already appeared. I've discovered both white flies and tiny tomato hornworms on several plants already. I'm handpicking the tomato hornworms and using Neem oil everything else. This brings up a good point: spend a little time with your plants, every morning if you can, and watch very closely. Pest problems almost always begin on the underside of leaves, so make sure to flip up the leaves and look closely. Downy white filaments (webs), holes and tiny droppings that look like pepper grains are all signs of pests.

After much wondering, I've finally decided on my anti-fungal approach for the early season. First off (and most importantly), I'm going to be treating proactively, but I'm sticking with organic products:

  • Neem oil. I've not used neem on tomatoes, but overall it's kind of wonderful stuff. It's an insecticide with anti-bacterial and anti-fungal properties. It's very safe for humans, and I've already started treating the plants once a week with it.
  • Copper fungicide. This is an organic fungicide. I'm using it as a weekly spray to prevent early season fungus from taking hold (hopefully).
  • BT (bacillus thuriengiensis). This is the mother of all anti-caterpillar treatments. I use the powder and sprinkle it on the plants liberally maybe once a month or so.
Aside from neem, I've used these other two products, but I think the difference this year is I'm acting proactively: I'm going to hopefully prevent the kind of early season problems I had last year that took out several of my plants and reduced my yield.

Oh yeah ... and the soil mix. In the past, I've grown tomatoes successfully in all kinds of potting soils, even the ones that plant snobs turn their noses up. I've also mixed up my own potting mix with excellent results. This year, I'm doing a bit of a hybrid mix:
  • Fafard 3B Professional Mix, which is basically just composted peat moss, perlite, pine bark fines, and dolomite lime
  • Composted cow manure, for a slight organic food boost
  • Perlite, to air out the mix after I add the cow manure (which is too heavy for good drainage, and good drainage is ESSENTIAL for good plant growth)
  • Dolomite lime, just a few tablespoons to boost the calcium and counteract the manure's acidity
  • Blood meal, for nitrogen
  • Bone meal, for another boost of calcium
So you see, it's some of this and some of that. Some bagged potting soil and some additions of my own. We shall see.

In general, though, I'm really excited about this weather: there's nothing like walking outside on these mornings and spending some quality time with the plants before the day starts.


Thursday, October 6, 2011

Now Here's Something Interesting

One nice thing about blogging is I have a permanent record of what I've done in the past. And check this out ... I didn't realize exactly how much faster the hydroponic tomato seedlings were growing until I went back and checked.

Here is Day 15 from this year:


I know that's the same photo I just used, but I wanted it for contrast. This plant already has several sets of mature leaves and is as tall as my hand.

Here is Day 18 from last year:


This plant was 3" tall at most and had only one small set of mature leaves. It's nowhere near as robust or large. Food for thought, right?

What this really makes me want to do is go full hydro ...

Wednesday, October 5, 2011

Seedlings, Day 15

I love this time of year. This mildly cool, breezy spell we're having is great. I'm outside every morning, watering and moving seedling trays, and it only reminds me that we're really heading into the fall and winter almost-Mediterranean growing season.

About those seedlings ... I might have over-reacted a little bit last weekend, after I first transplanted the seedlings from their hydroponic home into soil (I used 4" Jiffy pots). It's true that I'll never do this again, but I didn't actually lose any seedlings. Everything perked up after a day or two in a shady, protected spot outside, so here we are on Day 15, with tomato seedlings between 4" and 7" tall (depending on the variety), lots of greens, and much smaller peppers. The trays are currently spending most of the day outside, and I've been acclimating them to more sun and wind every day. I'm watering every other day and feeding with a diluted fish emulsion fertilizer, plus the worm castings in the soil mix.

I figure I'm about two weeks away from planting. I find at this stage it's helpful to stake up the young transplants, especially after thinning them out. The young plants typically lean on each other for support, so the combination of cutting away their neighbors (you want only one plant in each pot) and exposing them to wind means they appreciate a little help in the form of a bamboo skewers.

If you're not doing seedlings, it's a good time to go out and buy your tomato transplants. Here are a few things to keep in mind:

1. It's great to see the expanding variety of tomato transplants on the market now. Even Lowe's and Home Depot typically carry a dozen varieties of tomato or more, including bicolor, cherry, beefsteak, and plum-type tomatoes.

2. Pick the healthiest plants possible, with sturdy stems and healthy leaves, but try to avoid buying tomato plants in bloom or especially plants that already have tomatoes on them. These plants are already acclimated to a smaller pot and have experienced an abbreviated "adolescence," or vegetative stage. They will never bloom as vigorously as a plant that's allowed to grow to its natural size before setting flowers. Plus, it's still really too hot to set tomato fruit. Most tomatoes will still be dropping flowers until the nights cool off a little more and the plant can actually set fruit.

3. Beware of these "three in one" 5-gallon or 3-gallon pots. I've seen a lot of these lately, with three tomato plants in a single 5-gallon container. I don't quite get it. A 5-gallon pot is too small for one plant, let alone three. And if you transplant them, are you supposed to separate the root ball? Or grow all three in one cluster? Even though the plants are large, I think you're better off just getting a standard 6" or 4" transplant.

4. Beware also of tomatoes labeled "heirloom." I'm not saying these aren't wonderful plants--maybe they are, and maybe they will yield great fruit--but paying more for an heirloom label has more to do with marketing than anything else. I've spoken to a bunch of nurseries, and almost no one in Broward County actually stocks true heirloom tomatoes. Flamingo Road Nursery is an exception, but they don't have heirlooms in stock yet (I called them this morning to check). Part of the problem arises from confusion over the word "heirloom." There really isn't a single definition, and there's no oversight body that decides what plants can be called heirlooms. Various definitions have been proposed. Here's an article I wrote about heirlooms that contains more information about what is and isn't an heirloom tomato (this links to a tomato-related website I've been slowly building based on material from the blog ... it's still less than half-done, but you know how these things go).

5. Buy your transplants within a day of planting them. It's best to get them into their permanent home as quickly as possible.


Saturday, October 1, 2011

Oct. 1 ... 1,000% No

Very cute, right? A nice little tray of seedlings popping up in their hydroponic home. Before I get to the part about wanting to poke my eyes out with a bamboo skewer, I'll talk about how the AeroGarden seedling tray worked. At first, I was amazed. Most of my seedlings sprouted within a day or two, instead of the usual three to four days (I took this shot just a few days after planting, not today), and they grew faster than I'd ever seen seedlings grow. Within no time at all, I had a bushy little garden of seedlings going and I was starting to think I was pretty smart.

Then our power went out yesterday and it forced me to transplant all the seedlings into soil today. And that turned out to be a good thing.

As Mark pointed out on the previous blog post, roots that grow in water are not actually the same as roots that grow in soil. They are, in fact, structurally different. Incidentally, this is why it's better to start cuttings in moist soil rather than a vase of pure water. Because when you transplant the cutting into soil, the plant will go into shock.

See, I knew this when I decided to start in water, but I thought it couldn't be that bad, right? I mean, how bad can the shock be?

It turns out pretty bad. Bad enough that I can't bear to even post a picture of the results. I've got trays right now of droopy, sad seedlings. I'm pretty sure the greens won't make it, but I've got my fingers crossed and hoping the tomatoes and peppers will. I staked up the little buddies and buried them deep, hoping their stems will sprout new roots. Now it's just a waiting game.

Will I try this again? One thousand percent no. The only way I'll start in water again is if I plan to grow the tomatoes in water their whole lives. And I'll never use the AeroGarden for seedlings again. They grow too close together and their roots get all tangled, so when it's time to move them, you have to rip off most of the roots. I'm sorry to harsh on AeroGarden like this ... it's a nifty product if you want to grow some herbs on your desktop ... but it's ill suited for serious seedling production.

Anyway, I'm sticking from now on with my traditional seedling method: fiber pots; a seedling mix of composted peat, perlite and worm castings; and regular fluorescent lights. If it ain't broke, don't fix it.

As for the season itself, I think we're getting underway. The temps are supposed to drop tomorrow, so it should start feeling like fall. I'd say it's time to plant tomatoes outside any time—my trays of seedlings are already outside, in dappled sunlight.


Wednesday, September 21, 2011

Seedlings: Day 1 (A New Start)

Whew. So, here it is, September 21, and I'm finally getting things underway. Believe me, these last two weeks have been a massive exercise in self-control not to plant, but I kept having to remind myself that the season is long and, at least with non-disease-resistant heirloom tomatoes, I'm not so sure the early bird gets the worm.

Last year, I started seedlings on September 18 and had them outside by October 25. If you remember, we had a brutal hot spell right around then, and my non-resistant heirloom plants were infected by septoria fungus right away. I ended up losing a few plants early in the season and spending the rest of the season battling this stuff with increasingly strong chemicals. So if anything, I'm in favor of a slightly later start to avoid the worst of the hot and wet fall weather. That said, I don't seem constitutionally capable of waiting much past the third week of September.

If, however, you're buying tomato plants, I'd still recommend at least another two weeks, if you don't have plants already. If you do have plants already, no big deal—just hope it cools off before they start to set fruit. Many tomatoes won't set fruit too far above 80˚F.

Anyway ... to the seedlings! This year, I'm trying something a bit different with my seedlings. In the past, I've always grown seedlings the same way: in peat pellets or 2" pots with a simple and basic mix of about 70% composted peat moss, 20% perlite and 10% worm castings, under compact fluorescent grow lights. It's worked like a charm, so there's no reason it shouldn't work for everybody (just make sure your lights aren't too old—they lose lumens pretty fast).

This year, however, I have a new(ish) toy I'm taking for a test run. A few years back, I got an AeroGarden as a test unit and I've used it to grow indoor herbs during the off-season. It's a nifty little unit, and you've probably seen these things in stores. They are basic, desktop hydroponic grow units. It's not advanced hydro and it's not complicated. (If anything, the downside is expense—I think the units cost a few hundred bucks each.)

AeroGrow also makes a seedlings starter kit. The concept is pretty simple: it's a styrofoam grow plate that floats on a shallow pool of nutrient-enriched water. A fish-tank air stone is used to aerate the water. The unit includes lights. It allows you to grow up to 66 seedlings in a small space. So what the heck, I figured, I'll give it a try this year. I'll keep you posted with pictures and progress as the plants sprout (early notice: the mustard greens literally sprouted overnight ... how satisfying is that?).

In general, this year I'm hoping to try a few new things, and I think I'll have to really revisit the question of organic versus non-organic growing methods. My own thinking on this topic is far from settled, and I've received a few letters from people who thought I really stepped on the kitten last year by switching to chlorothalonil in mid-season to control the leaf-spotting. I had another very, very good grower—someone I respect a great deal who makes a living from this—recommend preventive spraying with neem oil, an organic insecticide, bactericide and fungicide. I dunno yet. Right now, I see this as the central challenge of the season.

Mostly, though, I'm pretty excited. I've already developed the bad habit of checking on the seedlings like twenty times a day ...


Monday, August 22, 2011

The Plan

Oh boy, oh boy, oh boy. I've started to get seed packages in the mail over the last week or so, which can only mean one thing: tomato and veggie season is on its way! Yes, there's a hurricane apparently brewing in the Atlantic, and yes, it's still three million degrees every afternoon, but no matter—I'm already starting to fantasize about this year's veggie garden.

Before I get into this year's plan, I think it's worth remembering last year. I did pretty well last year—we ended up harvesting dozens of Brandywines and Cherokee Purples, plus yellow pears and other varieties—but it was definitely a building year for me. I had particularly bad fungal diseases last year and ended up using chlorothalinol, which made it possible for me to harvest lots of heirloom tomatoes in a climate that isn't exactly perfect for heirlooms (South Florida). But it was the first year I abandoned organic gardening principles. This year, I'm a little torn—do I treat preventively or not? I don't know yet. I guess I'll see what the plants say.

But all that's still in front of me. First, to the plan ...

We did some re-landscaping over the summer, so I've lost some growing room. But that just means I had to pick my varieties more carefully. As always, I'll be growing exclusively in containers, and I'm hoping to make an EarthTainer III at some point this year. Also as always, I'll be starting my seeds indoors under lights and growing them for about two weeks indoors, then two weeks outdoors before planting them out. I'm also hoping to hear from more readers this year with interesting and novel grow set-ups. I know from my emails that some of you are mad geniuses with tomato plants, so I say share the love! Let us all know what works. I'll be doing the same—lots of posts on nutrition, pests and diseases, varieties, techniques and all that good stuff.

Anyway, without further ado, here is my plan for this season:
  • Green Zebra tomatoes (25 gal. container)
  • Brandy Boy tomatoes (25 gal. container). I understand this is a controversial choice among many serious tomato growers. Brandy Boy is a hybrid created by Burpee seed company. It supposedly has the taste of the Brandywine, which is stellar, plus better disease resistance and vigor. The problem is, many people who are serious about heirlooms really detest Burpee, for a whole bunch of reasons. I get it. But I've heard good things about this tomato and I figured I'd give it a try.
  • Kellogg's Breakfast tomatoes (25 gal. container). Giant orange beefsteak tomatoes. They're a bit trendy, sure, but they're Giant Orange Beefsteak Tomatoes. I'm in.
  • Paul Robeson tomatoes (25 gal. container). I'm ridiculously excited about these. The Paul Robeson is a black tomato, similar to the Cherokee Purple, with a supposedly excellent flavor. I can't wait to see if these live up to the hype.
  • Laroma III paste tomatoes (2 x 15 gal. containers). I like a lot of paste tomatoes for salsa and whatnot. These are VFFNA, so they should have good disease resistance.
  • Various lettuce greens. This includes a mescal mix, mustard greens, and Swiss chard. I've been on a big greens kick this year. Not only are leafy greens great for you, they're just good.
  • Strawberries (AgroTower stackable containers). I'm doing another tower of strawberries, but this time a smaller one. We shall see.
  • Broccoli (Earthbox). This is a no-fail way to produce awesome broccoli.
  • Habanero peppers (Earthbox). Chocolate habanero (see above: salsa).
  • Bell peppers (Earthbox). Because they rule.
  • Herbs. Probably a full herb garden ... plus I established lemon grass over the summer, so I've got lots of Thai food growing in my yard.
And that's where I start. These plans always sort of expand as the year goes on, so stick around and let's keep our fingers crossed for perfect weather, no bugs, and even less disease ...


Wednesday, April 27, 2011

Tomatoes in Earthboxes (A Reader's Perspective)


Early season shot ...


And the harvest comes in!

I got the above photos not too long ago and thought, "Now here's a gardener who knows how to use an Earthbox!" The plants looked beautiful (nice yard, too). So I wrote Steve and asked if he'd be willing to share his experience with Earthboxes—and I was kind of surprised to learn this was his first year with them. If anything, though, it makes his results more impressive. Earthboxes are a great way to get started growing vegetables ... they're easy and they deliver. But enough from me. Here's what Steve has to say about how to get the best results from Earthboxes:

1. How long have you been growing in EarthBoxes? What made you decide to go the EB route instead of in the ground or with big containers?

I started with two EBs on Jan 14, 2011, after reading your article in the Sun Sentinel. At the time, I had four tomato plants in the ground in the only semisunny part of my yard and they were doing OK, but the sprinkler system was spraying them regularly and I knew the situation wasn't ideal. I read your article and actually set out to start building a few Earthtainers but quickly realized it wasn't for me. I'm an engineer, but just reading the instructions had me worn out, and I was concerned with the aesthetics since these were destined for my pool patio, which has the best sun coverage. So I re-read the article and scrapped the DIY plans and bought two EBs from Amazon. Two weeks later I realized that two wasn't enough and added two more. The 'never enough' syndrome is the only EB downside in my opinion.

For me, the consistent supply of water and fertilizer is what makes the EB ideal. There is no guesswork involved in watering or fertilizing. You can't overwater. The casters are also nice in case we get a freeze or really bad weather. We can roll them into a protected area.

2. What's the biggest challenge you've found with EBs? It's been my experience that, with big beefsteak tomatoes, they need watering at least once, sometimes twice, a day near the end of the season. Did you experience this also?

The biggest challenge for me was probably a robust staking method. The EB does have a staking system that adds a decent amount of cost but I also added some Ultomato stakes (more $$) to system because I didn't really want to use the supplied netting. The tomatoes do take an amazing amount of water, but that never was a big problem for me. I watered mine twice a day with a watering can. The four boxes probably used about 6 gallons of water total each day. I've since added the EB automatic watering system which so far has worked great.

3. What varieties have you grown so far? Did you get a decent harvest?

With a relatively late start in January, I was in a big hurry to get the boxes going so I just picked up three varieties from the local stores: Better Bush, Bonnie Select, and Patio. I was overly focused on buying container oriented plants so I ended up with small determinate varieties. The Patio is really too small for this system, but the yield is OK and they taste great. The yields from the others look to be good, though they're still ripening. I have had two cases of TYLCV (tomato yellow leaf-curl virus), which does limit the yield somewhat. Next season I'll be trying indeterminate heirlooms.

One of the four boxes was dedicated to herbs which has worked out great. I'll always have an herb box from now on since fresh herbs in the kitchen can't be beat. After tomatoes are done, I plan on one box with hot peppers. We'll see how they can take the S. Florida summer.

4. Are you going to keep growing in EBs, or try something different?

Absolutely and without reservation. Its a great product. Thanks again for opening my eyes to them.

Monday, April 4, 2011

Hydroponic Tomatoes

One of the great things about running this blog is getting pictures from fellow gardeners all over South Florida of their own tomato gardens. This year in particular, I've gotten a few from gardeners who are doing pretty incredible things ... including Brian. Brian grows hydroponic tomatoes in a set-up he created himself, and he's probably too modest to say it, but he strikes me as a mad genius. So I asked Brian if he'd be willing to share his method and he agreed.


For the uninitiated among us, hydroponics is the practice of growing plants in a water/nutrient solution, without soil or potting media. The plants are rooted in a sterile mixture for support, and they obtain their nutrients directly from the water. In addition, root-zone aeration is increased, sometimes dramatically, depending on the type of hydroponic setup you're using. But I'll let Brian tell the rest ...


1. So you're growing tomatoes hydroponically outdoors. How did you decide to go that route and what's your basic set-up look like?


In a nutshell, my local soil stinks. I already had a 440-gallon rain barrel collection setup, so trying hydroponics made sense. I researched hydroponics on the Internet and it sounded promising. I decided to set up a test garden and see how it went. I chose the ebb and flow method as it seemed to meet my needs with the least hassle. The growing medium I chose was coco coir with a layer of red lava rock under it for added drainage. For my test setup, I used eight 5-gallon buckets, which I connected together using 1" PVC pipe and fittings. I used an old 15 gal. fish tank for my nutrient tank, and with some creative pipe work, I came up with a system that fills, drains, and controls overflow all from one point.


2. How many plants do you grow in each container? What kind of harvest are you getting?


My test garden consisted of five buckets with two tomato plants in each, one bucket had six silver queen corn plants, one bucket with basil, one bucket with six blue lake green bean plants, and on a whim, I planted a pumpkin seed from the Halloween jack-o-lantern I carved. All plants were started on November 1 from seed indoors using Rapid Rooter plugs and a fluorescent light. The harvest was beyond my expectations. Let's just say all the neighbors on my street received tomatoes. I never counted exactly, but the ten plants yielded close to 100 tomatoes, and there are still a few on the vine. Most were in the 1 lb+ range with a few coming close to 2 lbs. The six corn plants produced four usable ears, two of which filled in close to 100 percent. The basil grew like a weed; I would top it in half, and a week later it looked like I didn't touch it. The green beans produced four double handfuls of beautiful beans. The biggest kick I got was the pumpkin plant. I didn't even expect it to sprout. Not only did it sprout, it actually produced a pumpkin!


3. What was the hardest part to get right? I've heard that outdoor hydro is hard because of rain water, animals, etc., encroaching on the growing containers. Did you have issues like this?


My hydroponic garden is a work in progress so I can't say I've got it right yet! I have had great results so far with a few bumps. I think the most confusing issue I had was which nutrient solution to use. There are hundreds of them: powders, liquids, two-part mixes, three-part mixes, etc. It can be overwhelming to a novice, which I was. The other critical factor in hydro is the nutrient tanks' PH level. It's very important to monitor it and keep it within the range for what you're growing. It's easy to do, but must be done if you want great results.


Rain really hasn't been a issue up to this point. I'm a bit of a weather junkie so I check the radar daily. When rain is heading my way, I simply disconnect a fitting and the rain water flows through the buckets and onto the ground instead of back into the nutrient tank, which would dilute it. In reality, having your plants get a good rain is benificial, as it's recommended you flush your buckets with fresh water every week or so. This eliminates the buildup of unused nutrients and salts that can settle in the bottom of your buckets. Salts will block the roots from absorbing the nutrients they need. Surprisingly, the local critters have ignored my garden completely. We have racoons, opossums, and of course, birds. I haven't seen one bite or peck up to this point, knock on wood. My best guess is the neighbors leave enough dog/cat food outside to keep the wild critters content.


4. If someone wanted to start growing hydro tomatoes, where should they go for good information and resources? How can I get started?


Try www.simplyhydro.com. It's a great resource for the hydroponic beginner. It's a cleanly designed website with easy reading and clear information. Ive done my travels through the hydroponic web and their website is on target.


As far as tomato-specific websites, there are too many to remember, all with varying opinions. I took in as much information as I could and tried to balance it with my situation. You have to remember what works for a gal in Ohio might not work for us here in South Florida. Bugs, weather, etc. It's all different.


One great local resource for hydroponic information and products is Greentouch Hydroponics in Davie (5011 S. State Rd. 7, suite 104, 954-316-8815). Carey and Mike who work there are both very knowledgeble and helpful. Mike can go into detail on micronutrients like nobody's business. His nickname, Ozone, is well deserved. It's by far the best local Hydroponics store in Broward in my opinion. For online shopping, another great resource for hydroponic stuff is Grow Smart Hydroponics. They have fast shipping and great pricing and helpful staff as well.


5. What varieties of tomatoes are you growing? Do you have problems with fungal and bacterial diseases, etc.?


My first test setup, I planted Burpee Super beefsteak hybrids. They did great. The flavor was OK, and the size and quantity were outstanding. I currently have a second setup with another Burpee beefsteak variety just starting to flower. In the nursery, I have Heinz and Brandywine varieties almost ready for transplant. To me, the Brandywine will be the real test of my hydroponic setup. As you know, they can be finicky so I'm excited to get them going. Up to this point, powdery mildew has been my biggest fungal issue. It went untreated in the first test setup of tomatoes due to it showing up so late in the plant's development. The plants had already given me 50+ tomatoes, so I decided to let it go as the plants would be replaced soon with new ones. I've since been using preventitive spraying of Neem oil and seem to have the issue under control. Like everyone it seems, I have had some mystery leaf curl issues as well, but no real harm done there.


(From Jon ... if you have any questions about the particulars, leave them in the comments section and I'll make sure they get answered!)


Wednesday, March 23, 2011

Reviewing This Year's Varieties

So the season seems to have entered the final stretch ... this is right about the time I'm starting to think about lessons I've learned this season, start to plan for next season, and in general wonder where the growing season went. Don't get me wrong, I love summer (even our summers), but it's hard not to miss the growing season.

One thing I will say about this season: it wasn't great. It could have been worse, but I wasn't exactly breaking records, if you get my meaning. I had much worse disease problems than normal. In the end, I grew six varieties of tomatoes, including Brandywine, Cherokee purple, yellow pear, Big Boy, Early Wonder, and Victoria Supreme. The picture above shows a bit of everything except the Big Boys and Early Wonders. Here is my quick review of each:

  • Brandywine: Amazing taste, beautiful tomato, the rightful queen of TomatoLand. After fending off massive disease problems with an aggressive spraying program, I got a medium yield of medium to large fruit. Still, just on bragging rights alone, this is a winner, and my friends and family loved them. My advice: if you're going to grow these, plan on spraying from the beginning.
  • Cherokee purple. Beautifully colored, excellent fruit. I'll definitely grow these again—people regularly ask me if I have any more to give away. I also got a pretty heavy yield for an heirloom, although the fruit were generally a bit smaller than the Brandywines. It was somewhat more disease resistant than the Brandywine and ripened earlier, although they were also sprayed. The same advice applies here: if you're going to grow them, plan on spraying.
  • Yellow pear. Slow to start, but once it kicked in, I got loads and loads of fruit. Whole baskets full of these things. They are very sweet and delicious and I got in the habit of leaving them around in bowls as snack food. I lost two plants, though, to yellow frizzy top disease.
  • Victoria Supreme. Excellent disease resistance. Of all the tomatoes I grew this year, these were the only ones that didn't get sprayed at all. It's a great cooking tomato with very few seeds and quickly cooks down into a thick, rich sauce. I made up a sausage and pepper tomato sauce midway through the season, with fresh parmesan and a handful of basil, that was a big hit this winter. I'd grow these again as a standard paste tomato.
  • Big Boy. Well, they grew at least. I dunno. These are pretty dependable producers, aside from some splitting, and they have great disease resistance. They're quite lovely, too. But in a side-by-side taste test with Brandwines, they just ... squish a bit in comparison.
  • Early Wonders. I can see the appeal of a tomato that ripens in fifty days. It's really pretty amazing, especially considering that some of the others went WAY past their anticipated harvest dates before I started getting fruit. But these ... well, I don't want to speak ill of a tomato. Let's just say the flavor was insipid to middling and the skin was vaguely reptilian. I won't grow them again.
As far as growing methods are concerned, it was a pretty standard year, with the addition of a pretty aggressive spraying program. I'll cover this in another blog, since it's a big topic and deserves attention. I had to seriously rethink my devotion to organic gardening techniques this year.

Finally, I've gotten a few cool emails from people showing their own growing systems, so I'm going to post these in the near future, along with explanations of how they did it. If you have a particularly nifty method, or got outstanding results this year, feel free to shoot me an email.

Oh yeah ... I'll also try to get up some more harvest pictures, because everybody loves tomato smut.

Wednesday, March 9, 2011

Reader's Questions, Part II


#1: I've had a problem w/something eating the tomatoes (see photo above), usually the day before I planned to pick the fruit. Is there something I can spray/put on the tomatoes to repel pests?


Answer: I've had the same problem before ... to me, this looks like rat damage from Norway rats (or roof rats or fruit rats). If you live in a neighborhood with lots of fruit trees, there are going to be fruit rats outside, and guess what? They like tomatoes. Rats typically eat tomatoes at night, leaving dime- or quarter-sized holes in the fruit, ruining that piece of fruit. Personally, I don't spray for rats—it's never got bad enough that I had to worry about it, and I figure they can take a few and it won't really hurt me much. If I had to spray for them, I'd probably test a homemade garlic or cayenne spray on a few tomatoes to see if it hurt them, then try that as a deterrent.


#2: About the container size. I see where you suggest 10 gallon. What would be a good source of something

this size?


Answer: I buy used 25-gallon tree containers from a local tree nursery for $5 each. I'm not overly concerned about the look of my tomato containers, and I like the big ones, so it's usually a simple matter of asking if they have any old ones laying around that I can take off their hands. You can also buy large (and much better looking) containers at most big-box stores. Remember that a cubic foot equals about 7.5 gallons, so it will take about two cubic feet of soil to fill a 15-gallon container. If the container isn't labeled for size, use its soil-holding capacity as a general guide and remember: the bigger, the better.


#3: Will picking your tomatoes on the earlier side reduce pressure on the plant and allow it to set more fruit? I have a bunch in the light red phase right now, but due to the cold weather, not a ton of green fruit coming on. Wondering if picking will allow the plant to make more tomatoes?


Answer: Not really. Indeterminate tomatoes will continue to produce fruit as long as the vine is still growing. However, you can produce larger fruits by removing some of the flowers so the plant puts more energy into the fruits that remain. Also, topping your plants will encourage larger fruit and (obviously) stop new tomato production.


#4: My biggest frustration is with my tomato plants the past 2 years. I grow them in ground, they grow up as healthy large plants. They produce plenty of flowers-but before they have opportunity to fruit-something is eating them. Whatever it is seems to occur at night-the buds are nipped off one after another, only the flowers-the rest of the plant is fine. I have sprayed 'Safer" organic spray over the flowers and is not helping-more flowers have been eaten. I reviewed your blog but did not see anything mentioned regarding what pest could be causing this.


Answer: This was a stumper for me. I figured maybe some kind of beetle or caterpillar was active, so the standby treatment is bacillus thuringiensis (BT) for chewing insects. But honestly … I never did find a bug that targets tomato flowers specifically at night. If you are the author of this question and feel like jumping in, I'm very curious: whatever happened in the end? Did you take care of the issue and set some fruit after all?


#5: I'm worried about the cold front coming through early this week.What is the best way to protect them?


Answer: Ah, cold damage. This is persistent concern for us as we typically have at least one or two cold fronts pass through each year (although we've probably seen the last of our cold weather this year). In general, tomatoes can withstand down to 50 degrees without too much trouble, although they will likely stop setting fruit. If the weather is going below that, water the plants before the night sets, then cover the plants during the night. I've also seen people wrap their plants with LED holiday lights, which give off just the tiniest bit of heat, and it really seems to work.


#6: Since you use concrete reinforcing mesh for your cages, I'm curious if the rust on them is a concern?


Answer: The rust itself isn't a concern, but it's definitely best to keep your tomatoes off the wire supports. A tomato rubbing against its cage will cause misshapen, scarred and rough fruit.


And #7 … This question has been posed in various ways by lots of people, so I won't print any particular letter. And (just because I'm difficult like that) I'm not going to answer it right now either because it's a 10-pound question in a 2-pound bag. But here it is: "What are the best varieties of tomato to grow in South Florida?" You'll immediately see why it's such a big question—it's a bit like asking a parent which of their children is their favorite (the tall one? the smart one? the one that looks like you? or the one that doesn't look like you?). And it's also highly personal, because my taste in tomatoes might not be your taste in tomatoes. Nevertheless, in the near future I'll give you my two cents, for what it's worth. Which, in all reality, is just about two cents.


Monday, February 21, 2011

Reader's Questions, Part I


So to the questions! I might break this into two posts so it doesn't become a novella, but we'll see. And thanks to everyone who e-mailed me questions. I'm not posting names, etc., here (because technically, I didn't get everyone's permission to post these) but if you see a question you wrote, feel free to bask in my gratitude.

#1: Hi Jon In the photo below should I be concerned about anything and if so what is it and how do I treat?


Answer: This is a condition called catfacing. It's actually a malformation of the blossom caused by incomplete flower development. This, in turn, is typically caused by cold weather or cloudy weather that messes with the flowers as they first set fruit. Heirloom tomatoes are somewhat more susceptible to catfacing than some of the newer hybrids, which have been bred for uniformity of shape. For the most part, catfacing is a harmless, but strange-looking and even ugly condition. It does become a problem, however, when the skin splits and allows pinworms an entry point.

#2: I was reading some of your articles on your index but could not find if fertilizing should stop at a certain time prior to harvest or if I can continue to fertilize my tomato plants right up to and through completion of harvest.

Answer: Good question! Most people are growing indeterminate tomatoes (vines) that produce fruit over a period of time until the vine dies or the heat sets in and kills it. (Technically, tomatoes are perennials—a single well-managed vine can produce for nine months or more.) So yes, you can keep these plants going longer and producing longer by continuing to fertilize throughout the plant's entire life, even as you're harvesting fruit. You can also extend the harvest by removing brown and dead leaves and keeping the plant in good condition. Production will move from the bottom of the vine to the top of the vine. Of course, a major limiting factor for most people is space—who has room for a 12-foot vine?—so we top our plants. But we can still feed throughout to give them a boost. For indeterminate tomatoes, keep feeding up through harvest.

#3: A leaf-curling twofer ...
Is it a sign that my tomato plants are not getting enough water if the leaves are curling? AND

I have a mystery. Yesterday, I noticed the leaves on the upper half of my plant are starting to curl into burritos. I have changed nothing. I even brought the plant in when we had a very cold night a week ago. Can you diagnose for me?


Answer: Ah, leaf curl. It drives me crazy too, and I've spent untold hours trying to figure out what causes leaf curl and how to stop it. I ended up finding a lot of conflicting information and very few solid answers. In the end, though, leaf curl is a generally harmless condition and it won't affect your fruit set or harvest. As long as leaf curl is the only thing going wrong, no big deal. If it's accompanied by yellow leaves, brown spots, black spots, stunted or frizzy growth, or any other symptoms, that's a different ballgame and there's a problem.


#4: My local nursery sells their own mix of potting soil that sounds like what you get.

I don't have a list of the exact ingredient but from what I remember it contains

peat, fertilzer, dolomite, perlite. It comes in 2 cu/ft bags. Would this be good in my pots? Would you use only this or mix in something like Black Kow? How many bags are needed for a 25 gal. container?


Answer: At first glance, it sounds like a pretty standard potting mix and that's a good thing (with one caveat). The soil mix I typically use includes these same basic ingredients. But let me back up a few steps. A good potting soil mix has a few characteristics we care about: structure, water-holding capacity, nutrient-holding capacity, and an acceptable pH. Thus, a very basic mix might just contain peat (water and nutrient holding), perlite (structure, to allow drainage), and dolomite (a pH balancer). In higher end soils, you might also see pine bark fines (more structure). Anything after that is fertilizer or bonus ingredients, along with wetting agents to keep the soil moist in the bag. In general, I don't buy soil that has fertilizer already added to it—it's typically a balanced fertilizer and not geared for vegetable growth. Instead, I add my own fertilizer elements, like blood meal, bone meal and composted cow manure (Black Kow) to enrich the soil. I never recommend using soils with water retention crystals for tomatoes. So in answer, the question of adding organic fertilizer elements, like Black Kow, is a personal one. Personally, I do. BUT also remember, compost is heavy and reduces the soil's structure. So if you add stuff like compost to bagged soil, throw in 1 part perlite for every 2 parts of your compost addition. Keep the soil light, fluffy, airy, and able to drain quickly. You can always feed later in the season, but you can never correct for heavy, soggy soil.


Lastly, that's a good question about conversion rates, so here it is. There are 7.5 gallons in a cubic foot. So I use 25-gallon containers, which means it takes about 3 cubic feet of soil to fill them up and leave a little space at the rim. This can get pricey if you're buying custom mixes, so I tend to buy all my own bulk ingredients and usually spend about $100 in soil ingredients each season.


****


Whew. OK, so that's it for today. More coming, and if you have any questions, send 'em over and I'll add it to the list.

Sunday, February 20, 2011

Why Do I Bother?

I'm working on a Q&A post right now, answering some of the questions that have been emailed to me over the last few weeks ... but in the meantime, I'm going off on a tangent here.

Lately, the question of "Why do I bother?" has been on my mind. When you get into something like growing tomatoes and veggies in your own garden, if you're like me, at least a tiny part of your mind (or perhaps your spouse) is like, "Why are you doing this? There's a whole grocery store of fresh veggies down the street, and if organic is so important to you, just buy organic." Why bother indeed?

To me, growing vegetables is about more than plants ... it's about food, and food can be a complicated thing. It has a moral dimension to it, whether we like it or not. I find it depressing that, for a lot of people, they view their food as a moral failure. Perhaps they don't eat as well as they wished, perhaps they eat too much sugar or just too too much of everything, and their food becomes all wrapped up in self-loathing and body image. It ceases to be fun. It stops being a source of pleasure.

On the other hand, I know lots of people who bring an overriding moral and ethical dimension to their plates. They are concerned with the source of their food—they want food that was raised in an ethical, humane, environmentally responsible way. I have vegan friends who don't really LOVE vegetables, but to them, the trade-off is simple: their eating is an expression of their ethical concerns over the way we raise, slaughter and consume animals. This camp—the food ethicists—is varied. There are the locavores, the vegans, the raw foodies, the people who buy only organic, the people who go way out of their way to buy humanely raised meat.

I've written before that I'm not a "point of view" gardener—I'm not doing this to impose my values on your food. This isn't the blog where you'll find me railing against corporate food (flawed as it may be), nor the place where you'll find a stout defense of using (or banning) GMO organisms.

Which leads me back to my question: Why bother? If eating ethically isn't my point—if I'm even willing to ditch organic methods in the face of persistent fungal problems—then why go through all this trouble?

I grew up in a food family—in my house, cooking was communal. We'd plan meals as a family, shop for ingredients, then spend a day (or two) making obscenely difficult meals. As an adult, I've gone through probably a dozen food phases ... for a long time, it was nothing for me to spend 8 or 9 hours tending a wood fire to smoke barbecue. Then there was the artisan bread phase, when I was spending two days on hand-crafted loaves. There was an Asian food period. A soup era. A year of learning how to use Indian spices.

So the more I thought about it, the more I realized that my relationship with food has traditionally been without an ethical or moral component. My primary concern has always been quality. Because for me, food has always been about community and the privilege of feeding people things they like. To me, food has always been about people. About taste. I approach food as a cook, not as a cause.

And if my interest in homegrown, prime quality veggies happens to overlap with the crunchiest of granolas, then so be it. The fact is, homegrown, properly raised vegetables and fruits picked at their peak of ripeness, handled lovingly, and prepared immediately are by far the best. You know how many tomatoes I ate sliced and raw before I started growing my own? None.

Lately, I've noticed a quiet friction in the overlap between me and the people who want me to support their cause because I happen to like their food. But maybe my viewpoint is skewed. I spent two years covering the global produce industry for a leading trade magazine, and I really learned how the modern food chain operates. The truth? It's a miracle. Yes, there are trade-offs—and yes, there are many, many issues with mass agriculture—but I think the fact that anyone can walk into a grocery store any time of the year and find fresh, ripe produce is an amazing development. Anyone in this country today ... ANYONE ... can eat better than the richest kings of antiquity. It's true we have the choice to kill ourselves with processed food, but we also have the option to buy fresh cherries in December. That's something.

But lately, my ethical awareness of food has been growing. Having written extensively about agriculture, the meat industry, and farming, I'm finding new dimensions in my relationship to food. Not only am I eating many more raw tomatoes than I used to, I'm finding more satisfaction in it for reasons that have nothing to do with simply awesome tomatoes.

Ultimately, though, I suspect for me the issue will always come down to taste in the final sum. Call me a hedonist, but I'm indulgent by nature and I'm willing to go great lengths to satisfy these more basic urges. So even though I have an increasingly complicated relationship with the moral dimension of food, I know one thing for sure: I would grow all my own food if I could, or get it from people who I knew and knew how it was raised, when it was picked, and how it was treated. As miraculous as Mexican peppers in January might be, there is still nothing that compares to the variety, taste, and freshness of an heirloom pepper I grew in my garden, treated with minimal chemicals, watched warm in the sun, and picked a half hour before we ate it.


Monday, February 7, 2011

And Now, A Word from Strawberries ...

I'm taking a little break from tomatoes here to bring an update from Strawberryville. Last year, I did a few plants in little pots, just to see how it went, and I was pleasantly surprised. So this year, I scaled up a little bit into a stacked planter (I picked one from Agro-Tower). I don't have loads of experience growing strawberries, but I definitely have the desire—homegrown strawberries are so much better than store-bought strawberries, it's like they're barely even the same plant.

Anyway, I planted them in Fafard 3B and I've been watering every other day and feeding weekly with a Fox Farm liquid fertilizer I happened to have laying around. I haven't sprayed or treated them in any way. Taking advice from people much more knowledgeable about strawberries than myself, I picked off all the runners and plucked off brown leaves. I rotate the whole tower every morning so all sides get even distribution of sun.

I lost about seven plants within a week of planting, which sucks in a planter of 30 plants. The loss was limited to one side of the tower, so I'm not sure what happened but maybe they were overwatered, or maybe that was the "dark" side. I don't know, but oh well. I didn't replant.

Overall, though ... look! An actual tower of strawberries. The berries are medium sized and intensely sweet. I don't know how many I'll eventually harvest, but if all those berries swell and ripen, it looks like we'll get a few quarts of fruit. I suspect if I want bigger fruit, I should pinch off about half of the flowers.

So will I grow strawberries again? Um, hell yeah. Next year, I'm thinking of adding another tower and putting in a drip irrigation system to control the watering better ... Pretty soon I'm going to run out of yard space, but one cool thing about growing in containers like this? When the season is over, it all goes bye-bye into storage and the pool area goes back to looking like a regular old pool area. You'd never know a thing.


Thursday, February 3, 2011

The Heirlooms Are Coming!

So ... this is a weird season all around. After everything getting off to that slow start, in the last few weeks, my tomatoes have turned a serious corner. Remember how I couldn't get the Brandywine to set fruit to save my life? All of a sudden, it set about a dozen tomatoes, and they're growing fast. The first one (the top picture) is nearing harvest and looking like a monster. You can't tell from the picture, but that's a 1.5 lb. tomato. The same goes for the Cherokee purple. In general, this plant is more vigorous than the Brandywines have been, and it's just loaded with fruit. Pretty soon, I'm going to start picking daily, and they all look like the one pictured below (in a word, lovely). The Cherokee purple, btw, is a excellent, excellent tomato. You should grow them. Really. They are thin-skinned and won't save at all—you pretty much pick 'em and eat 'em. But it's so worth it. They taste just exactly like a tomato should taste. Finally, even the yellow pear is setting fruit heavily now, and my second planting is doing exceptionally well. The new Brandywines are already three feet tall and growing fast. No fruit yet ...

Obviously, the key this season has been effective spraying, and for about the past six weeks I've been following a program that rotates between chlorothalinol (Daconil), maneb and copper fungicide spray, supplemented with a micronutrient foliar spray (Key-Plex). I've been a little surprised how well the plants have responded. Nevertheless, I'm not in love with all the chemicals, so next season--having proved that spraying works--I'm going to see if I can do a preventive spray program based on organic chemicals, including sulfur- and copper-based fungicides and stay away from the chlorothalinol and maneb. It's a work in progress.

Oh yeah, the Victoria Supreme paste tomatoes have also been bearing heavily. I made a fresh tomato sauce this week with Italian sausage and fresh basil that was seriously amazing.

So all in all ... I'm a little afraid that I proved my wife right yet again: that I'm reactionary and maybe a little hyper. It seems that every year I freak out early on, then end up with a decent harvest anyway. But I swear, I was really worried this season was going to fall flat—I even worried I might be skunked for a while there. And while I'm not going to complain that things seem to have turned around for the moment, let's just say I'm feeling rather ... chastened.

But enough about that, because you know what else is going on? I'm starting to get seed catalogs already and staring to think about next season. I know, I know. But there are a zillion varieties out there I think I need to try, and some I can recommend with confidence. Before I write that post, however, I'd love to hear from anybody else out there: what varieties of tomatoes have done well for you down here in Zone 10?

Thursday, January 13, 2011

To Pick or Not to Pick?

This time of year always presents a challenge for me. Waiting for tomatoes to ripen is like waiting to open presents on your birthday when you're a kid ... if you're birthday dragged out over weeks and there was a whole host of hungry animals waiting to steal your presents.

But when exactly is the right time to pick a tomato? Should you let your fruit get fully ripe on the vine, or pick your tomatoes earlier and let them ripen inside?

Turns out that ripening is a pretty complex process. As the tomato goes from green to red (or yellow or orange or whatever), a number of tasty and nutritious things are going on inside the fruit. It's busy making carotene and lycopene (both healthy antioxidants), softening, producing flavor compounds, and become slightly more acidic. Notice that I didn't mention sugar content. You'll see why in a second.

Once ripening starts, it's pretty much impossible to stop, whether you're ripening them inside or leaving them on the vine. Along the way, tomato growers use a few terms to describe the stages of ripening red tomatoes, including:

  • Green: Most commercial tomatoes (except greenhouse tomatoes, which are allowed to fully ripen on the vine and marketed as "vine ripened") are picked at the "mature green" stage and either allowed to ripen during shipping or gassed with ethylene gas to promote rapid ripening. Tomatoes picked at this stage haven't had time to develop all the complex flavors yet, and gassing them only shortcuts the slow, complex ripening process. Ick.
  • Breaker: A breaker is a fruit that is just beginning to change from green to yellow, pink, or red, with about 10 percent of the fruit's surface changing color.
  • Pink: Tomatoes at this stage are covered with red on about 30% to 60% of the fruit.
  • Light red: Between 60% and 90% of the fruit is red.
  • Red: Fully ripened, with 90% of the fruit being red.
Technically, you can pick tomatoes any time and let them ripen off the vine—even a fully green fruit will begin to ripen once it's picked. But is there a flavor difference between tomatoes that are picked as breakers or pink and light red, and ones that are allowed to fully ripen on the vine?

Well, here's the truth: it all depends on who you ask.

I'm an Alice Waters fan. You know, Alice Waters, spiritual godmother of the locavore movement, organic vegetable guru and owner of Chez Panisse in Berkeley. Here's what she has to say on the subject:

"Regardless of variety, size or color, the best tomatoes are fully ripe, but not necessarily vine ripened. Experts say the very best way to ripen them is to pick them off the vine just as their color is starting to change from orange to red, and to keep them inside for four or five days, ideally at 59º to 70ºF. This will maximize their sugar and acid content, which actually decreases if the fruit is left on the vine to finish ripening."

Experts? Which experts?

Actually, though, Waters is onto something: J. Benton Jones, author of THE definitive textbook on tomato plant culture, confirms that sugar content in tomatoes does decline as the ripening process continues, but that slight decline actually takes place throughout the ripening process.

Okay ... so what does Barbara Ciletti, author of the tomato garden primer in the book In Praise of Tomatoes say? How about this:

"The best tasting, sweetest tomato is the tomato that stays on the vine, soaking up the sun, until it has reached the glowing pinnacle of its intended mature color."

So if we put Waters and Ciletti in the octagon, who would win?

Anyway, here's how I approach ripening, and obviously, take it with a grain of salt. I do.
  1. Early in the season, I tend to pick tomatoes that are not yet fully ripe because I get impatient. Then I let them ripen inside while I stand over them yelling, "HURRY!" When they are fully ripe, we eat them. But sometimes, I'll break down and eat them before they are fully ripe, with a little salt and pepper.
  2. Later in the season, when we have so much fruit that I'm out of counter space, I let the tomatoes ripen fully on the vine outside and inevitably lose some beautiful ripe fruit to the various beasts that have been watching me grow their dinner all season.
And guess what? It's all wonderful.

(One last side note: this whole question becomes more complex when you're dealing with multihued tomatoes. Black tomatoes can be downright confusing, and striped and bicolor tomatoes present a challenge of their own. But that's a post for a different day.)