Sunday, October 31, 2010

Good Morning, 'Maters.

I like these mornings during vegetable season ... I get up when it's dark, get the kids off to school, and spend a few minutes with the tomatoes before going to work.

It's nice.

I know people have very strong opinions about organic versus non-organic, and what kind of growing medium is best, and even what variety of tomato is best, but I'm not really a "point of view" gardener. I'm not really trying to impose my belief system on the garden. I think I've tried almost everything, and you know what? I've grown good tomatoes almost every way. I've harvested excellent, tasty tomatoes with regular Miracle-Gro tomato fertilizer and common bagged soil—just like I've harvested awesome tomatoes with high-end micronutrient foliar sprays, exotic organic fertilizer blends, homemade compost, and custom soil mixes. I've eaten good tomatoes from the ground, containers and Earthboxes.

I would never want to make it seem harder than it is. If anyone was to ask me, "What's the best way to grow vegetables?" I'd say: every day, bit by bit.

No matter what other choices you make, I think if you're willing to spend a little time every morning with your plants (or at least every other morning), everything will be fine. Give them water on a consistent schedule (I actually water every day), feed small amounts of food consistently, and mostly, pay attention. Your plants will do a remarkable job of telling you what's going on. Do you see spots on leaves? Yellow streaking? Are there holes chewed in the leaves? Are they surrounded by flies? Are the blossoms dropping off or setting fruit? Is the fruit developing normally?

The only way to really find out what's going on is just to keep an eye open for it. And chances are, it will be easier to deal with than you think.

So these are easy, rhythmic days. Watering, watching, feeding weekly, tying up the vines as they grow, and plucking off suckers. Really, there are much worse ways to start a day.

Wednesday, October 27, 2010

Problems ... already

Well, well, here's something interesting.

One of my growing experiments this year is using 5-gallon coconut coir grow bags. I bought the product from HydroGardens, and they're really cool. The coir comes in a little block in a bag. You add water, and the brick expands into a 5-gallon bag full of coconut coir grow medium. Coconut is a little bit different than peat ... it retains water better, and most importantly, it's completely sterile and pH neutral. With peat, we add dolomite lime to balance the pH (peat is acidic and dolomite lime is a base), but the dolomite has the added benefit of supplying calcium and magnesium for the plants. With coconut, however, you can't use dolomite because it will raise the pH since the coconut is already neutral. Tomatoes, like most vegetables, like a slightly acidic environment (around 6.0 to 6.5 on the pH scale), but not too much.

So how do you deal with the calcium/magnesium issue in coconut? If you can't get it from dolomite lime, then where? I mix agricultural gypsum in at planting (for calcium), and supplement weekly with magnesium. Additionally, I feed with a balanced fertilizer and add bone meal (for more calcium). This has worked for me, and I've gotten some great tomatoes from these coconut coir grow bags.

This year, though, something new and interesting and awful is happening. I'm growing yellow pear tomatoes in the bags. One plant is vigorous and huge and beautiful and already flowering (the bottom photo). The other is stunted, with severely curled leaves on the top of the plant (the top photo). I've inspected carefully for insects (there are none), and I don't think there's a problem with temperature, watering, or nutrients, which can all cause tomato leaf curl.

Instead, I believe this plant is infected with the tomato leaf curl virus. This virus causes stunted plants, curled leaves from the top of the plant down, and new growth that stands upright instead of laying flat. I've never had this problem before. According to my reading, infected plants can still yield tomatoes, but if they are infected young (as this one was), yields might be reduced or in some cases, completely non-existent. There is no cure for tomato leaf curl virus.

So sadly, to prevent the spread of this to my other plants, I'm going to have to destroy the plant. Which means fewer yellow pear tomatoes for me and one long face ...

Monday, October 25, 2010

Brandywines at Home

Woo hoo! We have tomatoes!

So I've finally finished planting the tomatoes, peppers and cucumbers. It's been kind of a slow process ... with me running out every so often and doing another container. I still have to get to the strawberries, broccoli and lettuce. But that's okay, because there's lots of time.

These pictures show the basic large-container set-up for the Brandwine tomatoes. I'm using 25-gallon containers with two vines per container. The soil mix was:

  • 2 parts peat moss
  • 2 parts composted cow manure
  • 1 part perlite
  • dolomite lime (a few handfuls)
  • bone meal (for calcium)
  • blood meal (for nitrogen)
This is an organic-based growing mix that is enriched with slow-release nutrients and will provide plenty of calcium and magnesium. I'm watering every day in the morning. If possible, water your tomatoes in the morning, always at the soil level. Never water tomatoes from above and avoid water and dirt splashing up on the leaves. This will reduce the chance of bacterial diseases.

As for fertilizing, I didn't fertilize at all the first week, but yesterday I started with a program of weekly fertilization with Espoma TomatoTone organic tomato fertilizer. You can use pretty much any vegetable fertilizer you want—I like Espoma because it's organic and I've had good results with it. Here's a tip: whatever fertilizer you're using, use it at half- or quarter-strength every week instead of biweekly or monthly. Plants are just like us ... they prefer lots of small meals rather than gorging on one giant one.

I'm also supplementing once a week with a 1/4-teaspoon of magnesium to boost the plants a bit. Magnesium is widely available in garden centers.

Finally, I'm pinching off all the side shoots on the vining plants (indeterminate tomatoes). These little suckers emerge from the space between the leaf stem and the main vine stalk. If allowed to grow unchecked, they'll reduce the yield and increase leaf mass, which reduces airflow and increases risk of a fungal or bacterial disease. So yeah, keep the vines clean.

And that's pretty much it for the big container-grown plants. This is the great part: it takes a few days for the vines to acclimate to their new home, and then they start growing like crazy. I'm already seeing the first tiny flower buds hanging like little bells, but there are no open flowers yet.

Finally, I'd like to offer a shout-out to this weather. Last year, we had a two-week heat wave in October that nearly did the plants in. This year? Just perfection as far as I can see. This is truly tomato weather.

So you tell me ... how are your plants doing?


Friday, October 15, 2010

Ready, Set ...

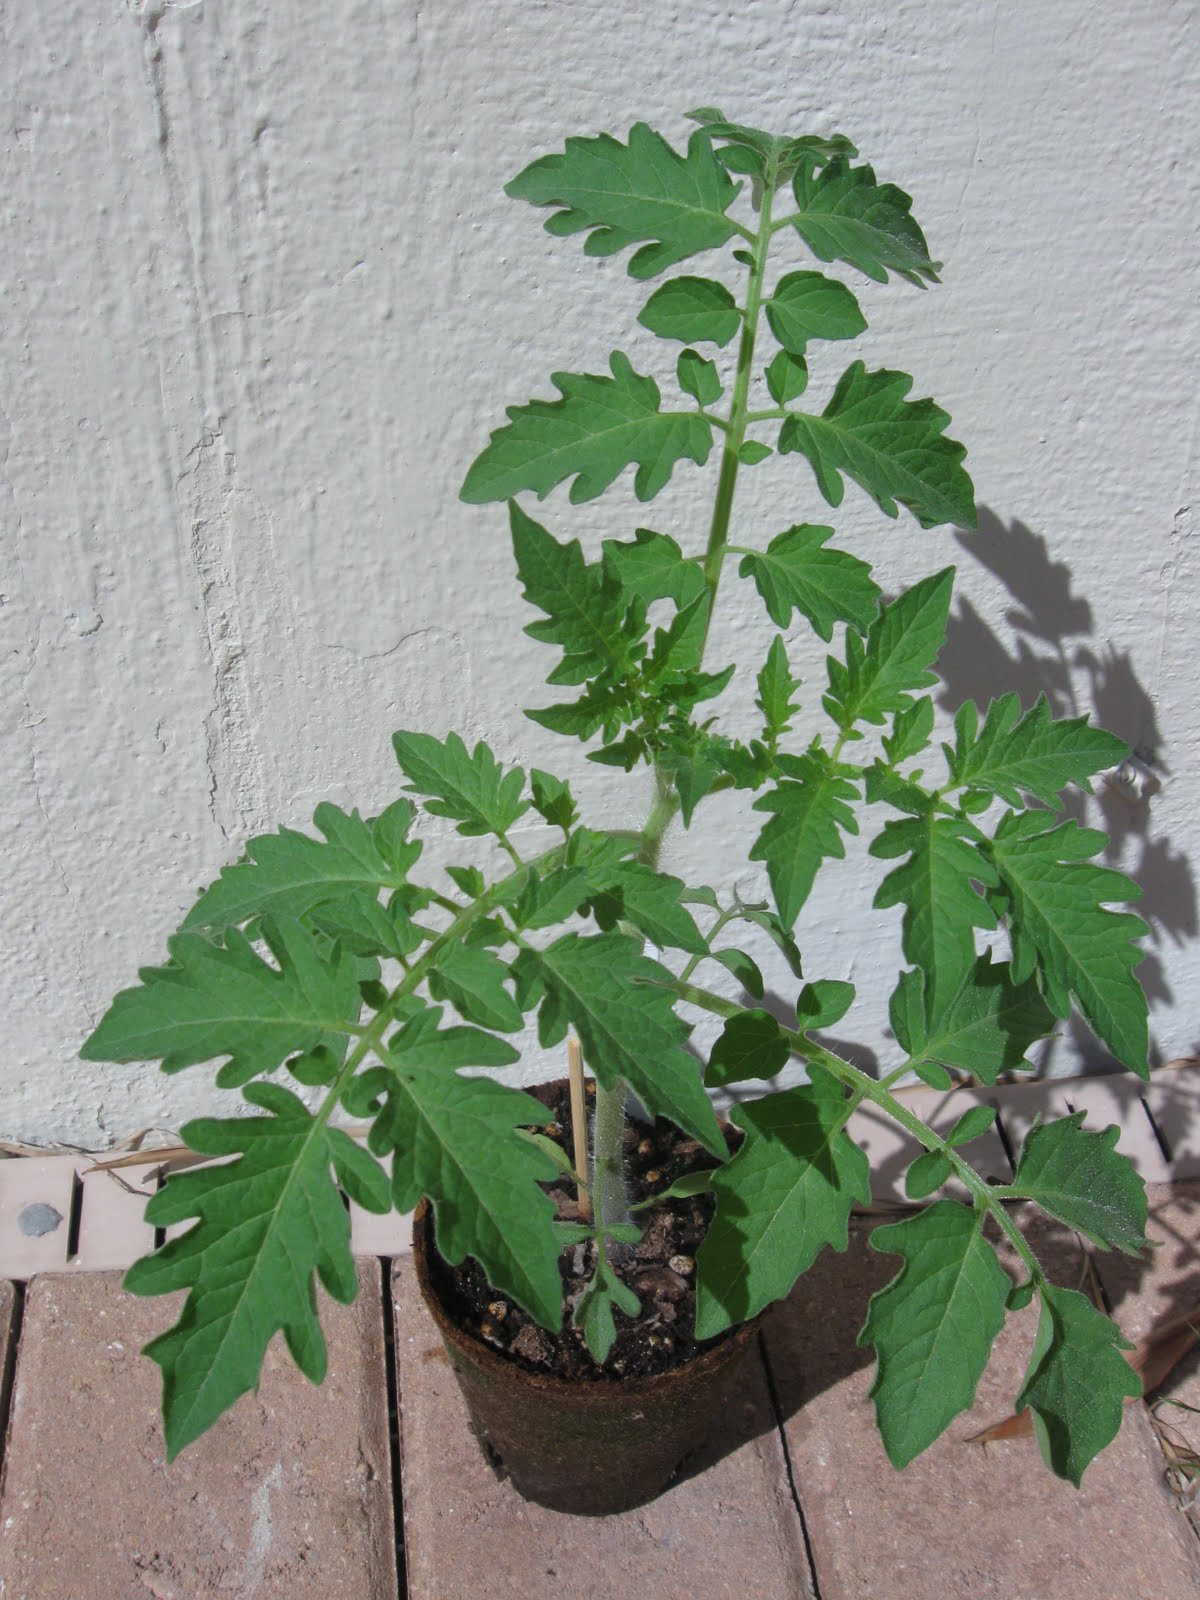
Now that's a seedling! This yellow pear seedling is clearly ready to go into the ground, so I'm thinking this weekend, I might end up planting some tomatoes. The weather is supposed to be perfect and fall-y, and at least a few of my seedlings are ready to go.

In general, the last week has been extremely good for these little guys. They've shot up, strengthened, filled out, and are starting to look like actual tomato plants. Actually, I have to admit that they sort of outpaced me—I was looking forward to spending next week talking about some fundamentals, and then planting next weekend. But I'm not going to complain about outrageously healthy transplants.

So ... let's get down to the nitty gritty. This weekend, I'll only plant tomatoes in conventional containers (as opposed to using an Earthbox or in the ground). The Earthbox is a whole different animal that I'll deal with later, but if you're planting in the ground, all of the following stuff still applies to you. I'll post photos after I finish, but here's the gist of the thing:

1. Remember how it's all about dirt? It absolutely is. Tomatoes like rich, loose, fast-draining soil for optimal growth. Yes, you can plant tomatoes in sand and they'll likely do OK (if you're good), but if you want ridiculous tomatoes, use good dirt. This year, I'm using Fafard 3B Professional Mix (purchased from Nu-Turf of Pompano), which I'll juice with dolomite lime, bone meal and blood meal. This particular bagged soil is blended for nurseries and has all the stuff I'm looking for—it's loose, chunky, and slow to decompose. You can also blend your own soil. Here's the recipe I used last year with great success, along with some more tips for container culture. Can you use a regular bagged potting soil, like Miracle-Gro? Yes. I would avoid any mix, however, that has water retention crystals, and if possible, try to avoid previously enriched mixes. They are usually nitrogen heavy, which encourages leaf growth at the expense of fruiting. But if that's all you can find, fear not.

2. Add a shot of dolomite lime, even to previously balanced soil mixes. Dolomite lime adds magnesium and calcium to the growing environment, and both are absolutely essential for healthy tomatoes. Tomatoes are very heavy consumers of calcium, and plants that are deficient in calcium develop blossom end rot, which is annoying and ruins your fruit. You can buy a big bag of dolomite lime at a decent garden center, and it will last forever. I use about 1 cup of dolomite per 20 gallons of mix.

3. Countersink your tomatoes! Don't be afraid to really bury those suckers. Cut off a few of the lower leaves and really sink the plant. Tomatoes will sprout roots from the stem, so this will result in healthy, more vigorous plants.

4. Remember to plan for staking them up. Your tomato plants will likely grow into monster vines, hopefully laden with 10 or 20 pounds of fruit. They will need to be staked up. As always, I'm using the same tomato cages I made years ago. Here are instructions on how to make your own. Whatever you do, don't count on those flimsy "tomato cages" they sell in garden centers. Those might work up north, where tomato vines only grow knee-high. Down here, an eight-foot vine will make a mockery of the little cage. If you don't want to build your own cage, you can get sturdy cages from places like Tomato Grower's Supply Company, although they are much more expensive to buy than make yourself.

As far as feeding your plants, I would hold off right away, so we'll talk more about fertilizers in the next few days. Transplants are still tender, with their little roots still toughening up. You don't want to hit the plant with a dose of strong fertilizer right away or you could end up with burned leaves. So you can use a transplant solution if you want, or you can give them a dose of fish emulsion (which I probably will), but hold off on the serious feeding for now.

If you must, and especially if you're growing organic tomatoes, add a little bone meal (for calcium) and blood meal (for nitrogen) to the soil mix. Follow the label instructions—these gentle, organic fertilizers are very unlikely to burn transplants.

One final thought: there's actually a fair bit of controversy surrounding the use of composts in your potting soil. I've used Black Cow composted cow manure for years, with great success. It's heavy (which is bad), but it's also a steady source of nutrition (which is good). I've also heard good things about composted chicken manure and mushroom compost. People who dislike these products say they are 1) too heavy and impeded drainage in containers (which is always bad) and 2) unstable, so you don't really know what you're getting. Personally, I'm not one of those people, and if you're planning on growing organic tomatoes, I think mixing a bag of compost into your growing media is a great idea.

Just remember: if you do add compost, I'd also dump some perlite in there. Perlite is used to increase drainage in potting soil—it's the little white stuff. It's nonorganic, but it doesn't compress over time and starve the plant root's of oxygen. Root-zone oxygenation is one of THE MOST important factors in healthy container plants. So ... if you want to use compost, pick up a bag of perlite while you're buying the compost and add that to the mix also. Your tomatoes will appreciate it.

Whew! So that's a lot, right? But handling the planting right is easily half the battle. (Although I think I say that often enough that this battle must have ten halves ... ha ha.) You want the biggest container you can handle, with the best dirt, and the healthiest transplant. Once you get that far, you can let the tomato itself handle a lot of the driving from here.

Wednesday, October 6, 2010

Seedlings: Day 27

I don't know about you, but the wind this week drove me a little bit nuts. Is it too much to ask to have a few weeks of perfect days? Seriously? All I'm asking for are light breezes, lots of sunshine, and mild temperatures for the next, oh, six months or so. Anybody? Please?

Anyway, I figured it was time for a seedling update. The seedlings are now spending all day outside in trays, then coming inside at night. I'm watering them lightly every morning, and I feel like I spend an inordinate amount of time running them back and forth. A few days ago, I stepped up their pots from the little 1.5-inch Jiffy pots to larger 4-inch Jiffy pots—this will be their last step up until they get planted for good. Technically, it's not a great idea to step up plants too many times—it's always a little shocking, and the roots have to grow through the Jiffy pots, which means more work for them. To make it easier on the new roots, I tear the bottoms off the Jiffy pots when I transplant, and in general, I find the rewards of this last step-up are worth the trouble.

When I transplanted the little seedlings, I countersunk the plants to give them extra strength. This is one of the great things about tomato plants—they will root from anywhere along the stem. So when you transplant tomatoes, it's always a good idea to bury part of the plant's stem under the soil. New roots will emerge from the buried portion and result in a stronger plant all around.

I'm still feeding them every third day or so with diluted fish emulsion, which in my house means they are NOT allowed inside until the fertilizer is completely soaked up and doesn't stink anymore. I've tried to blame the noxious odor of pulverized, soupy fish guts on anything else I can think of, but my wife ... she's not having it.

As you can see, I've had to stake up the seedlings, thanks to this gentle 20-mile-an-hour breeze that's been pummeling them lately. But on the bright side, much of the weakness that was freaking me out a week ago is gone—they are strong and healthy and growing fast, and I'm thinking in two weeks, maybe three, I get to have the Great Planting Weekend.

How are your seedlings coming along?

Are You A Ground Grower?

If somebody asked me what's the trick to good tomatoes, I'd say, "Consistency and dirt."

Consistency because tomatoes need regular care, and if you want a decent crop, there's really no substitute for developing the good habits of a tomato grower. (More on this later ...)

And dirt because it's the foundation upon which your whole season is built. Last year, I tested out a few fancy soil supplements in side-by-side experiments. I wanted to see if I could take my tomatoes to the next level, so I tried a micronutrient foliar spray and a probiotic soil drench. I have no doubt these are great products when used in the right settings, but I personally didn't see a difference between the plants I supplemented and my control plants grown under almost identical conditions (minus the supplements). At first, I thought the problem was me—maybe I just didn't know how to use the stuff.

But in a series of emails with the guy who developed one of these products, he suggested another reason: my growing conditions were already almost optimal. There was very little room for improvement, so he wasn't surprised to hear that I didn't really notice a difference. Basically, he was complementing my dirt.

Before we get into dirt, though, there's one point I want to bring up about growing in containers versus growing in the ground. You can great tomatoes either way, but there is a caveat: growing in the ground in South Florida isn't necessarily easier and does present a few challenges.

For one thing, our soil is loaded with nematodes. These tiny little organisms attack a plant's roots and cause a condition called root knot. Basically, growing in the ground means racing against the nematodes: you want to get a decent harvest before the plants start to lose vitality and your harvest is affected.

And nematodes aren't the only issue. South Florida has several kinds of native soil, including the mucky marl in western suburbs (which can be quite fertile) and the sandy soil in the east (which is lousy for growing anything). In general, though, our native, unimproved soil is not great for growing vegetables. The sandy soils don't drain especially well, and they tend to be deficient in nutrients. Tomatoes don't like this. As a result, plants grown in sandy soils tend to produce earlier, but smaller and less mature, fruit than plants grown in better soil.

I started growing in the ground, and I did pretty well. But over time, I gravitated to large containers for tomatoes (and I mean really large containers, like 25 gallons). Why? Because I realized I was treating the ground like a large container ... I was digging out big holes, then backfilling with the same soil mix I use in containers. Eventually, I just decided to skip the digging and go straight to containers. I haven't been disappointed yet.

So ... if you're planning on growing in the ground, you can still get great tomatoes and hopefully, I'll still have some helpful tips as we go forward. But I would definitely recommend against just plopping your plants into the ground without first improving the soil—trust me, you'll end up with a lot better plants with a lot fewer problems with just a little bit of preparation.

Sunday, October 3, 2010

Starting the Planning

The weather these last few days couldn't be any better (except maybe shave a more degrees off at night). I love this time of year, when the summer heat finally starts to break and it's tomato growing weather. So the time is almost here, and now is the time to start making a few decisions if you're planning on buying transplants. Here are the big ones:

1. What kind of tomatoes should I grow?
2. How should I grow them?

What Kind of Tomatoes Should I Grow?

Pretty much from the moment I started growing tomatoes, I've been trying to grow exotic and weird varieties. Striped, yellow, pink, giant, heirloom, and on and on. And it's a lot of fun to grow something weird and fantastic ... but there's a giant caveat. For most of these tomatoes, you have to start from seeds that you probably ordered. If you're planning on buying transplants, you'll be limited by the selection of whatever nursery you shop at. I don't buy too many transplants, but if you want a decent selection, try the Flamingo Road Nursery in western Broward. They're pretty dedicated to vegetable gardening and usually have a good selection of different varieties.

Also, especially if you're newer at this, I think it's nice to actually harvest tomatoes. Success is a good thing. So I think it's a good idea for that first season or two to go with something tough and relatively easy. Cherry tomatoes, especially, are rewarding. You want almost-guaranteed tomatoes? Try almost any small-fruited variety. Roma tomatoes (a paste tomato), Big Boy, Better Boy, and Celebrity are also great. They taste good, they're prolific, and they're large.

Whatever you buy, here are a few tips:

  1. Avoid plants that already have flowers and even small fruit. You're not giving the tomatoes a head start when you buy plants that already have started to flower. What's actually happening is that the plant has adjusted to its smaller container and started to mature. When you plant it, you'll be confusing it and setting it back. The plant won't grow as large or bear as many tomatoes as a truly immature plant. So look for strong transplants that don't have flowers already.
  2. Try to avoid plants that are completely root bound. If you can see masses of roots around the edge of the pot or coming out from the bottom, it's been in the pot too long and has become root bound.
  3. Look for plants that are resistant to the diseases and pests. Most of the commercial tomatoes will have the letters "VFN Resistant" somewhere on the label. This means the plant is naturally resistant to verticillium, fusarium, and nematodes. The first two (verticillium and fusarium) are fungal wilt diseases that can be a problem in our humid climate. The third (nematode) is a kind of nearly microscopic pest that lives in abundance in the soil and causes root knot disease. VFN tomatoes are resistant to some degree to all of these, which is a good thing because all of them are major problems in South Florida.
  4. Be aware of your plant's growth patterns. Most tomato plants grown at home are indeterminate. This basically means the plant is a vine and will need support as it's growing. If you're growing indeterminate tomatoes, you'll have to train it up some kind of trellis or support system while it's growing and trim the vine to yield maximum fruit. Indeterminate vines are nice because they yield fruit gradually, so you can pick tomatoes from the same vine for weeks or even months. The other variety is known as determinate. This basically means the plant is a bush that tends to stay smaller and bear all its tomatoes at once. If you're planning on canning salsa or sauce, determinate tomatoes are great because you'll get a whole lot of fruit all at once. Also, despite the fact that determinate tomatoes are stronger and bush-like, you'll still probably need to support a heavy-bearing plant with some kind of cage.
  5. Be ready to plant.
Ideally, you don't want your tomatoes to hang out in their tiny pots for very long. It's safe to assume when you buy tomatoes at a garden center that they've already been in their pots for a while. So get everything else ready, then buy your tomatoes and plant them within a day or so of getting them home. The sooner you get them into their permanent environment, the faster they can get down to the business of seriously growing.

How Should I Grow Them?

Buying tomatoes is easy, right? No problem. You just go, pick up a few plants and maybe a bag of soil and you're on your way. In reality, though, most of the decisions start AFTER you get your tomatoes home. Do you grow them in the ground? In containers? What about the Earthboxes? How can I get organic tomatoes?

I'll deal with some of this stuff in the next few posts, but here's a good place to start thinking about it ...

You can grow good tomatoes in containers (including the Earthbox) and in the ground. Either way. The trick is in the soil, and fortunately you can control that. Also, no matter where or how you plant them, they'll need AT LEAST five hours of sun. I tried tomatoes last year in a spot that only got four hours of sun every day and I got exactly one tomato from that plant, so five hours is the minimum. Six is better. And full sun all day is awesome.

Beyond sun, by far the most important consideration is your soil. I'll do a separate post (or two) on how to blend soil and how to improve Florida's native soil (which generally sucks) for maximum results. Ultimately, better soil equals better plants, so don't skimp on the dirt! Old, exhausted potting soil or sandy soil is a sure path to stunted and underperforming plants.

After this comes the fertilizer and watering habits. I'll write about all that later, but one note first: I know growing organic tomatoes is very important to lots of people—the reason they grow tomatoes at all is to have organic fruit. And I usually do a mix: some organic and some not organic. Ultimately, it's my experience that you can grow awesome tomatoes either way—provided you start with good soil. It always comes back to the dirt.

As for me, the seedlings are still coming along. They've started to grow faster now and the true leaves are starting to emerge. I've started feeding them with a weak fish emulsion fertilizer and they're spending all day outside under the sun ... I'm not sure exactly when they'll go into their containers, but it won't be long now.